Pages

Thursday, 30 April 2015

THURSDAY FEATURE - ERRY BERRY DESIGN


Since I am in the process of moving house which is much bigger and better, I have been browsing around for home-wares to decorate it with. While browsing I came across the wonderful Erry Berry Design who stock a range of modern, typographical artwork. 

Erry Berry Design is run by Cari Davies-Moore; a British graphic design artist. Cari runs Erry Berry in her spare time, when she is not busy doing her day job or looking after her little ones. Erry Berry's Etsy shop has been open since summer 2014 and all of the products found in the shop are designed and created by Cari. 

I really adore the simplicity of the designs and particularly like the ones featuring pale, pastel colours. I also have a weakness for nautical things and Cari stocks a fair few nautical designs. 

Erry Berry Design can be found on a range of social media including EtsyFacebook, and @erryberrydesign on Instagram.

I hope you've enjoyed discovering Erry Berry Design as much as I have and please pay Cari a visit and show her some love. 

(All pictures courtesy of Erry Berry Design)

Tuesday, 28 April 2015

HOW TO GUIDE - TERRARIUMS AND PRESSED FLOWERS


Selling on Etsy is a competitive business and so I am always looking to expand and introduce new lines which in order to appeal to a wide array of people. My recent obsession, which I feel is fitting for Spring, is flowers and terrariums. 

In my last post I mentioned how I had been foraging for wild flowers to use in my jewellery. Since my last post I have been pressing the flowers in preparation and thought I would take the opportunity to share how I did this with you. 

In order to press flowers you will need a few things:
> Flowers
> Two large, heavy books
> Kitchen roll

First things first, prepare your flowers by discarding any parts you don't want and trimming stems etc. 

Then you'll need your book and your kitchen roll; open the book to around the centre, tear off two sheets of kitchen roll (leaving them attached together) and sit them into the spine of the book. 

Once you've done all that arrange your flowers on the kitchen towel, ensuring they are flat and nicely laid out as you don't want them folded and creased. 

When you're happy with your arrangement fold over the other sheet of kitchen roll on top and close the book - it's as simple as that. 

Once the book is closed place the other heavy book on top to weight it down. You should then leave your flowers to press for 7-10 days. 


I left my flowers for around 7 days, mainly because I grew impatient. They all turned out fairly well; some had to be discarded because they went brown but that was only one type of flower. The only thing now is that I have no idea what to do with my flowers, but I'm sure I'll think of something when I'm playing around. 

My next little creation are some cute little terrarium necklaces. I had a collection of large glass bottles building and no idea what to do with them so thought I would create some little terrariums. 

To make your own terrariums you will need:
> Glass bottles and corks
> Sand/dirt
> Moss
> Eye pin and necklace chain
> Glue 
> Tweezers
> Charms, crystals, shells (optional)

They are really easy and quick to make. First of all take you glass bottle and fill with a thin layer of sand/dirt in the bottom; I aimed for this to take up around 1/4 of the bottle. Next separate out your moss out and using the tweezers push into the bottle - I used moss that was completely dried out to avoid condensation issues. Either before or after adding the moss you can add charms, crystals or anything else you wish. I made bottles which also had layers of  raw amethyst, had small charms like keys or arrows, and with shells I had collected the day before. Once you're happy with you're terrarium put a small amount of glue around the cork and fix it in the top of the bottle. When the glue has dried you can screw in your eye pin, if you wish to make it into a necklace or even a keyring. 

The ones pictured will soon be available to purchase in the Etsy shop but I'm currently in the process of moving house so you'll have to be patient with me there. In the mean time you can keep track of everything I'm up to on Facebook and Instagram and if you have any questions then please leave a comment. Hope you enjoyed the post and found it helpful. 

Thursday, 23 April 2015

THURSDAY FEATURE - VOODOO VENTURES


This weeks feature is the absolutely delightful Voodoo Ventures.

I was in need of some new business cards and also fancied some stickers with my little logo on and I could no recommend Voodoo Ventures highly enough. 

They offer a wide variety of personalised products for your business and the prices are fantastic - I got my 50 cards and 48 stickers for just over a tenner!! They also completely designed the business card with very little input from myself and the design is perfect and there is such attention to detail - even the social media logos are in vintage colours and fitting with my theme. 

Keep and eye out for these fab business cards and stickers as I'll be including them in orders from now on!!


Saturday, 18 April 2015

SPRING UPDATE

Now that uni has dried up and I have two weeks off of work I am able to devote a little more time to the business. I have so many ideas in my head and so many supplies turning up but haven't had time to do anything with them so I thought I would take the opportunity to include some of the them in this post.


Today I have spent foraging round parks and fields for wild flowers - its amazing how much you can still find when you live in the middle of a city! Now I have a few ideas for these some of which I don't want to give away yet. They are currently being pressed and we will see how they turn out in 7-10 days. I have toyed with the idea of flower lockets but they are already quite popular with other sellers so maybe I will be able to do something to them which has a vintage or steampunk twist. 


I also have a bag of sand and amethyst but I am waiting on one more item to arrive before I can start making them - I will likely to a how to blog post on what I am planning to make with them. That is if all goes well and my idea works but for now hush hush. 

Also if you follow my Facebook page then you will know I was asking what people thought about Rose Gold and whether this would be something you would like to see. I am pleased to say that the last of my Rose Gold supplies arrived today so I will be putting them together tonight and probably photographing tomorrow!

At the moment there is also a stack of laser cut wooden pendants ready for making in necklaces. I have ordered these for Etsy's "Redesigning Alice" competition. I am a huge Alice in Wonderland fan and so I will definitely be entering. I have been going through the original manual script (Available on the British Library website) to find images and been playing around to see what I can do with them. I will probably be working on them tonight or tomorrow - don't worry it's likely I'll make a post about what I am making for the competition (if all goes well that is). 

Keep an eye on the blog, as well as Facebook and Instagram for up dates on all my new makes. Thanks for reading. 

Saturday, 11 April 2015

HOW TO GUIDE - PACKAGING

Packaging is a simple way to make your business stand out. As I customer I love to receive my orders in cute packing and it makes me feel like a lot of care and effort has gone into my order. When I first opened my Etsy shop my packaging was very ordinary and, quite frankly, boring. But over time I have changed and personalised my packaging and I'm going to explain about it a little more in this blog.  

I'm a big fan of metals and metallics and I think that they work well with my steampunk theme. All of my items are bubble wrapped before being packaged into a cute gold and white striped envelope. As well as looking nice, this is also a simple and quick way of packaging when you have a lot of orders. I used to wrap my orders up in brown kraft paper like a Christmas present but this just wasn't practical when I had a lot to do. The bags are folded and secured with a Thank You sticker. 


My larger and more fragile items are packaged in a box which is wrapped with twine. There are so many different varieties of twine and it is an easy thing to adapt for different seasons; red and green at Christmas, orange and black and Halloween. I have slowly built up a large collection of twine - I seem to acquire the stuff quicker than I can use it. 

In my shop I also sell a variety of Alice in Wonderland themed jewellery and I recently came up with this idea. Any Alice inspired jewellery comes on a playing card and is again packaged in a white and gold striped bag. 


Since I sell jewellery which can be fragile I have to mark all of my envelopes as FRAGILE. I used to use fragile tape but thought this was absolutely ghastly and really didn't fit in with my handmade and vintage theme. I then explored getting a fragile stamp but all of the nice, handmade ones were out of my budget. Now I have settled for doing a hand drawn FRAGILE design on my envelopes. This design varies from order to order and I hope it conveys to my customers the effort that I put into their order. I also secure my envelopes with Washi Tape. At the moment I have a steampunk themed tape covered in old watches in a vintage style. However I am looking at getting different tapes for Alice in Wonderland orders and vintage orders. 
EDIT - Since writing this I have investiged in a gorgeous little Fragile stamp, which I'm sure you will be seeing in a future blog!


Thursday, 9 April 2015

THURSDAY FEATURE - CRAFTED CURIOS

Crafted Curios, 2015

For this weeks Thursday Feature I have chosen a fellow Steampunk lover - Crafted Curios. Based in California, USA, Crafted Curios specialise in unique, handmade Steampunk jewellery for both men and women

Johnny opened his Etsy shop in June 2014 and takes inspiration from many areas such as Sci-Fi, Fantasy, and Historical influences. Jewellery is made using a variety of materials, such as watch parts (my favourite), and processes - the end result is a range of gorgeously unique jewellery. 

For women there is a range of necklaces, earrings, brooches and hair accessories available. And for men there is a range of amazingly intricate cuff links. All of the pieces are one-of-a-kind and custom orders are also welcome!

You can find Johnny and Crafted Curious on a range of social media including FacebookInstagram, and Twitter- all of these also have some great behind the scenes photos and processes. He also has an Etsy shop stocked full of Steampunk goodness. 

All photos Courtesy of Crafted Curios.


Sunday, 5 April 2015

HOW TO GUIDE - IMAGE EDITING

Image editing is an important part of ensuring your products stand out and encouraging sales. Although I like my images to look as natural and unedited as possible, I will always edit just to enhance and make my products look as good as they possibly can. Since I mainly use my Samsung Galaxy S5 to take nearly all of my photos, I will use this post to show you the apps that I use and what I do to my images. 

First of all it is important that all your images are taken with natural light. My very professional set up involves taking photos on my windowsill. However although you want natural light, you don't necessarily want a bright and sunny day as this can create reflections and harsh shadows. To counteract this I will sometimes stick tracing paper to the window as a way of softening the light. 

Now that the basics are covered lets move on to editing the image. There are two main apps I use for actually "editing" the image: Afterlight and of course Instagram.

Afterlight
This is my go to editing app as I find it a lot more flexible than Instagram. I take all my photos using the 16 mega-pixel phone camera, rather than through the app, and then use the app to crop, rotate and enhance the image. 
This is the raw image taken and cropped. First of all I always sharpen the image to enhance any lines; I find this particularly useful for products in glass bottles or with tiny watch parts. The depending on the image I will either lighten it or apply a filter - both have pretty much the same effect but I find that enhancing the light level is more subtle. In some cases I will also slightly increase the contrast.  
This image has been sharpened, lightened and had the contrast increased slightly to enhance the shading of the Moon. Lets see another example:
Raw Image
Edited Image
If I use a filer the only one I use is "Glacier" which lightens the image and adds a frosty effect to the image. I never apply a filter 100%, in fact the strength is usually below 50%.

Instagram
If I'm feeling empty I will use Instagram so that I can instantly upload to my feed (but you can also do this through Afterlight). I rarely apply Instagram filters to my images now but used them a lot before I discovered Afterlight. The main filters I use are: Crema, Slumber and Valencia. If I am editing an image for an advert, rather than a listing photo, I tend to use the more dramatic filters such as: X-Pro 2, Amaro and Walden. I will also use Instagram to sharpen my images. 

A Beautiful Mess
When it comes to adding text and illustrations to my photos I use A Beautiful Mess. I think that you have to pay a little for this app but it is totally worth it. All of the pictures you can add are in a cute "hand drawn" style which is perfect for me. There are a variety of fonts available on the app, some of which you have to buy (again worth it), but I really like the cute "handwriting" style ones. 

Pixlr
I will use Pixlr when I want to create a collage or pictures. The app has a variety of different layouts and you can create different shape and borders around images. 

I hope you have enjoyed this blog and found the information useful.  

Friday, 3 April 2015

THURSDAY FEATURE - RUSTIC TAG HOUSE

Rustic Tag House, 2015
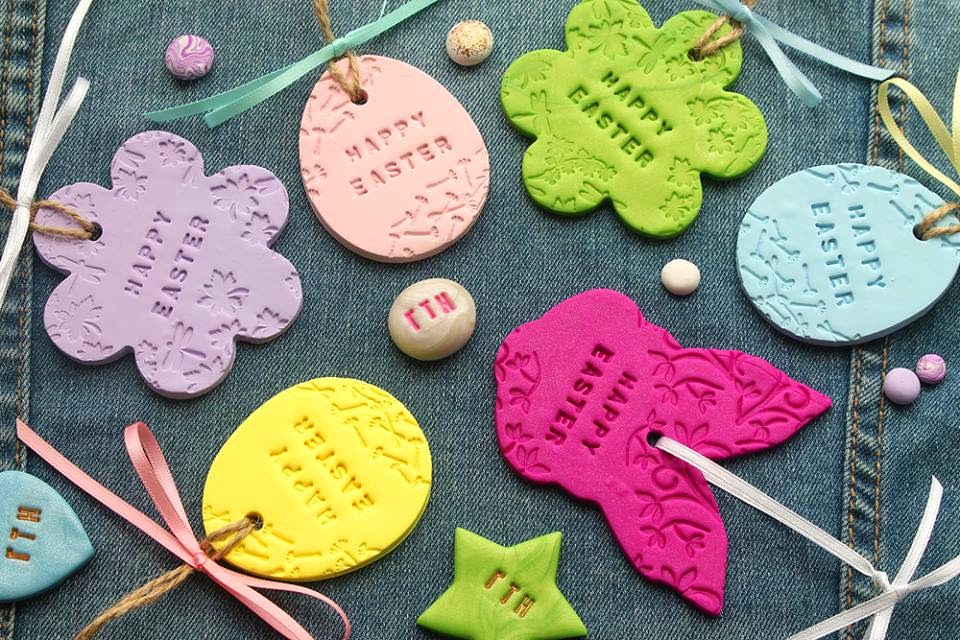
This weeks delayed (apologies) Thursday Feature continue's with the product photography theme and ways to enhance your photography. Rustic Tag House began as a small Facebook page making clay business tags for fellow small businesses. They have since expanded and now specialise in a range of handmade clay items including jewellery, keepsakes, wedding favours and home wares

My reason for choosing Rustic Tag House is firstly because of the beautiful items and secondly because of the way the items can be used to enhance product photography for your business - as is demonstrated by the business themselves. . . 
Rustic Tag House, 2015
The handmade clay tags are available in a range of shapes and sizes, such as clouds, shooting stars, hearts and cupcakes, and can be bought for as little as £3.00!! Which if you ask me is an absolute bargain for a personalised keepsake which can be used time and time again. 

Rustic Tag House, 2015

If you are interested in a cute little clay keepsake then you can find Rustic Tag House on Facebook or purchase through their website. You can also keep up to date with them on Instagram and Twitter

All photos courtesy of Rustic Tag House, 2015